Tuesday, August 31, 2010

Paula's Favo is Mayo!

Laura and I were laughing today about how much mayonnaise we have gone through over the past few weeks! With so many "salad" recipes we keep having to buy more and more jars. In fact I have a fettuccine recipe that Paula uses mayo as the cream base!

To say the least, Laura and I don't use mayo much outside of the occasional sandwich. Paula however loves to use it as the main ingredient. Simply changing the quantity and type of mayo you use can make a huge difference in the calorie and fat content. There are many options on the shelves and you have to sift through all of the bright colored labels to find which mayo is right for you. I typically go for lower calorie and lower fat as well as mayo instead of Miracle Whip. I prefer mayo simply for the taste.

On to the recipe...this weekend I made a version of Paula's Shrimp Salad in Mini Phyllo Cups. I was in a pretty big hurry and forgot to take the picture of all of the ingredients. Part of the way through I remembered and grabbed a few shots!
The shrimp...
The Phyllo Cups!

The mayo...and a cutting board :)


And the celery + green onion + seasoning mixture...


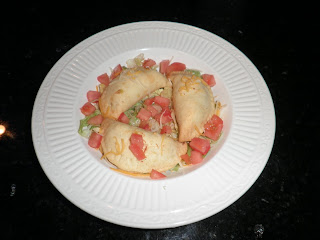
The overall flavor of the cups wasn't just incredible. I am not a huge fan of celery, and to me the celery flavor was just too strong. I would have preferred more shrimp and less celery and mayo. The recipe below is what I would do to fit my taste!

Oh, and sorry I didn't get a pic, I was in such a hurry to make my new Sunday sandwich recipe I forgot to take a final product picture...if it makes any difference, they look just like Paula's with less fat :)
I don't have the comparisons but I do know how many calories are in each baby cup. I don't have two dogs to get to, but I do have this calling my name :)


Each cup:
Calories: 56
Fat: 1.9g
Sodium: 85mg
Fiber: 0.1g


Shrimp Cups
24 Mini Phyllo Cups (find in your grocer's freezer!)
2 1/2 cups of shrimp, cooked, peeled and finely chopped
1/4 cup chopped celery
1 tbsp minced green onion
1 tbsp lemon juice
1/2 cup low fat mayonnaise
1/4 tsp salt substitute
1/4 tsp black pepper
Mix all ingredients (except phyllo cups) together. Fill each cup with an even portion of shrimp salad and enjoy!

Monday, August 30, 2010

More Fried Chicken, Y'all!

Kat and I must be on the same wavelength because I found myself revamping Paula Deen's Southern Fried Chicken, even after Kat shared one of her fried chicken recipes just last week! I love fried chicken, but haven't had the real thing in years, because once I start, I just can't stop myself. And then I want biscuits, topped with butter and honey. And then maybe some mashed potatoes with gravy (brown gravy, that is, I know how southerners love white gravy!). Or potato salad. And then have some pie . . see, this is why I don't have it!!

Here's my lineup (minus some olive oil):

I reduced the egg yolks by two and just used the whites. I also omitted the salt from Paula's House Seasoning and used crushed corn flakes to get that crunchy texture so I could use skinless chicken. I originally had intended to bake the chicken, but decided at the last minute to pan fry them, using 1 - 2 Tbsp oil to ensure that my chicken came out crispy. I was just in that kind of mood and the oven-fried method usually only works 50% of the time for me.

I set up my dunking and dredging stations. Egg, water and hot sauce on the left, crushed cornflakes on the left.

I coated the pan with enough olive oil to cover the bottom of the pan, about 1 1/2 tbsp of olive oil.

While I waited for the oil to heat up, I pounded out my chicken breasts. When I make chicken, I almost always use a meat pounder/tenderizer (not sure of it's official name) thing to flatten it out for two reasons. First, it makes the chicken cook so much quicker and it's easier for me to not overcook the little guys.

The second reason is evident below:
Look at how huge that piece of chicken is! I promise you, it was just a small chicken breast, but pounding it out makes it look so much bigger! So I felt like I was really treating myself to this huge piece of "fried chicken," but I'm really getting a very reasonable portion.

I've never tried the hot sauce in the egg mixture before, but I loved this recipe! It was crunchy and not overcooked (thanks to my meat mallet!) and had a little kick to it. I even had some today as leftovers over a salad with some egg whites and more hot sauce and it was still amazing!

What's your favorite thing to add hot sauce to? I've never really used it, but am thinking I should start but don't know what to put in on, other than eggs. Too bad Kat can't tolerate spicy foods, otherwise I would totally share my leftovers!

And the nutritional stats are . . . not quite ready! Sorry, guys, but typing up the ingredients for both recipes (while very important in comparing our recipes) takes f.o.r.e.v.e.r and I have a date on the couch with these two great girls and Hot Tube Time Machine, so I'll add them in later.


They don't look it, but they're excited!

Here's the recipe, it's a keeper!

FNF-ing Awesome Pan Fried Chicken

1 whole egg, plus 2 egg whites
1/3 c water
1 c hot red pepper sauces
2 cups crushed cornflakes
1/4 tsp pepper
1/4 tsp garlic powder
4 boneless, skinless chicken breasts
2 tbsp oil, for cooking

Combine the egg, egg whites, water and hot sauce and whisk in a small bowl. Pour the crushed cornflakes into a shallow dish. Heat the oil in a large frying pan.

While the oil heats up, pound the chicken breasts to ~1/4" thickness and season with pepper and garlic powder. Dip into the egg mixture and coat in cornflakes. Cook in pan, about 4 minutes on each side or until cooked through.

Sunday, August 29, 2010

A Very Special Simple Sunday

This week's Simple Sunday comes to you in a slightly different format (i.e. no cooking for me!) and was inspired by my very lovely sis-in-law, Lauren!

Lauren is a very hardworking, full-time mother, wife and law student and she also happens to be super sweet! She helped me with that awful Salmon Mousse Disaster, even though she doesn't even like fish!

The other day she commented on Facebook that she was so caught up with her studies that she worked right through dinner and all of the sudden it was 11 o'clock. What's a tired, overworked law student to do for dinner at 11 PM? Eat some Combos!

I laughed pretended to be shocked (trust me, I've heard worse!) and 'fessed up moments I'm less than proud of (Hershey's Kisses and Diet Coke for dinner, anyone??). If I lived in SC , I would whip up some healthy casseroles and tasty sides and toss them in her fridge for those late nights, but now that I live in TX, that's geographically unrealistic. I did want to send her some super simple, quick dinner options to help fuel her way through her studies. Please note I'm not doing this because I'm a dietitian and (people think) we're the Food Police, but because I love Lauren and her family and I think that good nutrition can do nothing but help (with school, health and life in general)!

So here is what I sent in her very special care package, all that is simple and can be prepared in less than five minutes!

I love having breakfast for dinner! I especially like it on the night's when Cody's on call, because I hate having to make a big dinner (and big mess) for just me. So sometimes I'll have some cereal or oatmeal, with some fruit and a boiled egg. I also send some natural peanut butter for a quick PB sandwich. Pair this with some fruit and you've got a filling meal!

Ah, the poor white potato. I feel bad that it seems to have gotten a bad reputation since the whole low carb craze began. Yes, white potatoes have carbs. But they also have fiber and can be super filling (remember Kat's Shrimp Stuffed Twice Baked Potatoes from earlier this week?) And as long as you're not eating the largest potato you can find and make smart stuffing choices, it's a quick and healthy dinner option. I found these broccoli and cheese servings in the freezer section. After a quick spin in the microwave, toss these on your spud and you have a Broc & Cheese Potato. Obviously I can't send the broccoli and cheese in the package, but you get the idea!

I like to keep a couple of frozen entrees and these guys in the cabinet for those days when I want something hot, but don't want to cook. These all are between 350 and 450 calories and have 600 mg of sodium or less. And they don't have to be refrigerated or frozen.

Sometimes, I'm lucky and have leftovers and I like to have some simple sides on hand. I like these little fruit cups because the fruit is in juice not syrup. I love these little cups of brown rice! They only take 60 seconds to cook in the microwave (compared to 45 minutes on the stove) and have less that 200 mg of sodium per serving, which is pretty low for an instant rice product. Most of the flavored varieties are much higher.

And a little something sweet for dessert. Kat and I are CRAZY for sugar free puddings! They're full of sweetness, but low on calories. Top it with some fat free whip cream and you have dessert for under 100 calories!

I sent some Crystal Light just because I'm OBSESSED with the fruit punch flavor right now and wanted to share it. Seriously, I think I could drink the whole 2 quarts if I didn't pace myself. every time I drink it, I feel like I'm seven years old again! The only thing missing is cookies and recess! I tossed in this coffee just because I had it. I think I had a coupon for one box free and it's just been sitting in my cabinet for awhile. But it's instant, so it fits in with my simple theme.

I added some snack bars just because I like snacks and bars. These are just a couple I have on hand in my office and purse for those moments I'm starving and lunch is still hours away.

I included a little note to explain why I'm sending her a box of food . . .

And sent it off to South Carolina, with love!

I hope you're enjoying your Sunday!

Friday, August 27, 2010

Frozen Friday

Yay for Fridays!!

I'm excited about this post! I've tested out a lot of Popsicle recipes, but this is one of my faves! I don't know if either of us have mentioned it before, but Kat and I LOVE sugar free pudding! I think we probably have it almost every day of the week!

I made some standard pudding pops, but added some frozen, chopped strawberries because I had some in my freezer.

I pulsed the frozen strawberries until they were kind of the texture of a granita dessert. I was initially going to chop them, but I worried they would all sink to the bottom.

The final product was tasty, but I think I like pudding pops the best without fruit.

Very delicious and a healthy treat for the hot summer!

Nutritional Information (OLD)
Servings Per Recipe: 4.5
Amount Per Serving
Calories: 46
Fat: 0 g
Sodium: 304 mg
Fiber: 0 g

FNF Strawberry Cheesecake Pudding Pops

1 (1 oz) package Jell-o Sugar-Free, Fat-Free Cheesecake flavored pudding mix
1 3/4 c skim milk
6 frozen strawberries, pulsed in a food processor until the texture of shaved ice

Combine all ingredients and pour into Popsicle molds. Freeze for at least 3 hours.

Thursday, August 26, 2010

1 Fish, 2 Fish, Red Fish, Late Fish

So as I admitted earlier this week, I missed posting my Simple Sunday recipe, and promised it later this week. Well here it is...

This recipe actually come from my dad. He used to always go wade fishing in the Gulf and would bring home fresh red fish. As a kid, I didn't really love this recipe. I think it had too much flavor and it was too goopy. As I have grown up a bit, I have learned to absolutely love this recipe!

You start out with simple fish. I will typically leave the skin on one side.


Basically, just salt and pepper the fish (not the skin), spread light mayo(2 tbsp per 3oz fish) across the top, and sprinkle with lemon pepper to taste.


You can either bake or grill these yummy fish!


The Facts for 3oz Fish:
Calories: 201
Fat: 13.9 g
Sodium: 303 mg
Fiber: 0

Creamy LP Fish
Fish
Light Mayo
Lemon Pepper
Salt Substitute
Pepper

Season the fish with salt and pepper, skin side down. Evenly spread mayo over the seasoning. Sprinkle lemon pepper to taste. Bake or grill fish until thoroughly cooked. Enjoy!

Wednesday, August 25, 2010

Paula’s Fond of Fryers

I know we just posted a recipe for fried chicken yesterday, but I’ve got another Fried Food makeover that turned out amazing! Paula’s original recipe for Fried Ravioli with Marinara Cream Sauce looked so tasty I couldn't wait to try it after my month-long run of fishy fiascos. It’s supposed to be an appetizer, but I just turned it into an entrée. The final product, as Paula would say, “It’s out of this world, y’all!”


First up, I cooked and coated my little guys. I bought the light ravioli because it was lower in calories and fat (and also filling, according to Cody), opted to use fresh breadcrumbs made from some double fiber bread and use 2 egg whites instead of a whole egg.


Once I had all my stations prepped, I dipped, dredged and popped the little nuggets into the oven. While they got toasty, I worked on the dipping sauce.


For the marinara cream sauce, I used my favorite spicy pasta sauce and added fat free half and half to make it creamy.


They came out toasty and golden and crispy. They were absolutely gorgeous! I’m telling you how fab they looked because once I got our plates ready I completely forgot to take a picture! I swear, I was overtaken with tunnel vision! All I could see was fried bites of ravioli and everything else was just background.


I thought they were delish, but I will say that Cody felt like there wasn’t enough filling on the inside (perhaps because they’re light?) and would have liked a heartier stuffing. I think next time I'll try a regular ravioli or one stuffed with meat to make it more filling for him and just serve myself a smaller portion. Love is all about compromise, right?


The stats are a big difference. I think the difference can be attributed to cutting out so much of the fat (from the egg yolk, heavy whipping cream, ground nuts). I didn’t add the oil in the recipe calculation because I wasn’t sure how much would actually be absorbed and consumed AND I only calculated half of the coating in each recipe because I ended up only using about half.


Nutritional Information (OLD) Nutritional Information (NEW)
Servings Per Recipe: 4 Servings Per Recipe: 4
Amount Per Serving (11 pieces) Amount Per Serving (11 pieces)
Calories: 733 Calories: 360
Fat: 51.7 g Fat: 10 g
Sodium: 1396 mg Sodium: 1015 mg
Fiber: 7 g Fiber: 7 g


Here’s the recipe.


Oven Fried Ravioli with Dipping Sauce


Ravioli:
9 oz package of light ravioli
2 slices Nature's Own Double Fiber Bread, toasted and ground into crumbs
1/4 c wheat germ

1/4 c Parmesan cheese
1/4 c skim milk
2 egg whites
pepper


Tomato Cream Sauce:
1 1/2 prepared marinara sauce
1/2 c fat free half and half

Preheat oven to 400 degrees. Place a baking sheet in the oven, before turning the oven on.

Cook the ravioli for 2 minutes. Drain on paper towel and set aside.

Combine the bread crumbs, wheat germ, and Parmesan cheese and set aside in a shallow dish.

Whisk the milk and egg whites in a bowl and set aside.

Dip the ravioli in the egg mixture and then dredge in the bread crumb mixture. Arranged on the preheated baking sheet, sprayed with cooking spray. Bake for 10 minutes or until crispy.

While the ravioli bake, heat the marinara sauce and fat free half and half. Serve alongside the ravioli for dipping.

Tuesday, August 24, 2010

Fried Chicken, Volume I...of too many

Laura and I were talking yesterday about the make up of Paula's Top 100. Not only do we not understand how they came up with this magical list, but were are also disappointed with the mix of recipes. The majority of recipes are shrimp and chicken with a few salmon and beef. Of the chicken recipes, there are at least 5 fried chicken recipes!!! As a dietitian, fried chicken is not a common occurrence in our house, but with the spirit of Foodies Not Fatties, I made Paula's fried chicken anyway.


I certainly was not going to batter and deep fry these little guys, so I had to come up with different ingredients to make them healthier. Two big changes were using skinless chicken legs and Fiber One Cereal.


I have been able to purchase skinless drumsticks before, but lately I haven't been able to find them. One tip I find helpful is using a dishcloth to help remove the skin. The skin tends to be very slimy and hard to pull off. If you use a dry cloth it will grab the skin and you can pull it off with no problem.


Instead of deep frying the chicken I baked it in the oven. Just spray the pan with Olive or Canola oil and then spray the chicken. Having the oil on the coating will hep it crisp up.


One thing that surprised me about this recipe, was that it actually looked like fried chicken. The dark color of the Fiber One cereal gave it a nice "fried" color. I might actually broil the chicken a bit longer to give it the "fried" texture.


Overall the chicken tasted okay. I wasn't thrilled or disgusted. I am looking forward to trying some of the other fried chicken recipes. I have lots of new ideas to test out!


I am having some technical difficulty with my label so all I have are the new nutrition facts. I will try to update this once I get things working.

1 drumstick
Calories: 141
Fat: 5.3 g
Sodium: 114 mg
Fiber: 5.3 g


Fried Chicken Numero Uno
1 tsp black pepper
1/2 tsp salt substitute
2 tsp Canola oil
1/2 cup Egg Beaters
1/3 cup water
1/4 cup white flour
3/4 cup whole wheat flour
1/2 Fiber One cereal, finely ground
2 lbs skinless drumsticks


Heat oven to 350 degrees.


Mix eggs and water in shallow dish. Mix all flour, cereal and seasonings in another shallow dish. Dip drumsticks in egg mix then roll in flour mixture. Place on baking sheet. Spray with Canola oil.


Bake until chicken reaches 165 degrees (about 45 minutes) flipping chicken halfway through. For a crispier texture, broil for the last 5 minutes.

Monday, August 23, 2010

(Sigh)

I would like to know how the handful of recipes we've collected have managed to earn the title of "Top 100." Surely, our recipe modifications aren't what's making them...less than stellar. Or perhaps they're just more suited to a different palate. I've landed another fail with Paula's Artichoke Rice Salad with Shrimp :( Sad day.


I assembled all my ingredients together and got started. I didn't use the marinade from the artichoke hearts because the mixture was goopy enough without adding another 1/4 cup of liquid. I also added peas instead of bell peppers because I already had some on hand in the freezer. I didn't add the pimentos OR the curry because I really don't like either. And the recipe also called for shrimp so I figured I could only handle adding one ingredient I dislike instead of three!

See what I meant by goopy enough??

I tried to tell Rooty this recipe wasn't looking so hot, so she might as well move on to something better, but she just stayed in her spot, watching.


After a quick roast in the oven, I pulled out the completed casserole.

It looks pretty but I didn't care for it because:
1. There was shrimp in it. I took a bite and I still don't like shrimp (no surprise there).
2. All I could taste was the "chicken" flavoring of the rice and pasta mix, I couldn't even tell there were artichokes in there.
3. 6 hours later, my stomach hurts. I asked Cody if the dish made me sick and he said the onset of illness depends on the bacteria; it could be 6 to 48 hours. I don't think the dish is behind my upset stomach, but I won't feel better about if for another 42 hours.

I'm going to keep it in my fridge and save my rating until I can have a neutral, shrimp-loving party taste it to get a true opinion. Perhaps I will bring some to Kat (in 42 hours!).

Here's the stats:

Nutritional Information (OLD) Nutritional Information (NEW)
Servings Per Recipe: 6 Servings Per Recipe: 6
Amount Per Serving Amount Per Serving
Calories: 331 Calories: 231
Fat: 18 g Fat: 9.4 g
Sodium: 854 mg Sodium: 606 mg
Fiber: 1 g Fiber: 01 g

And the recipe.

FNF Dish With a Whole Lot of Textures

1 (6.9 oz) package instant Rice and Pasta Mixture, chicken flavor
1 (6 oz) jar marinated artichoke hearts, quartered
1/2 c light mayo
1/2 c frozen green peas
3-4 green onions, chopped, white and green parts
pepper, to taste
1/2 lb medium shrimp, peeled and deveined

Preheat oven to 350 degrees.

Cook the rice and pasta mixture, according to package directions, omitting the oil/butter.

Drain the artichoke hearts. To the artichoke hearts, add the peas, green onions and black pepper.

Cook the shrimp, being careful not to overcook. Once cooked, chop coarsely.

Combine the rice and pasta mix with the artichoke mixture and the shrimp. Bake in the preheated oven for 20 minutes or until heated through.

Saturday, August 21, 2010

Should Have Been Simple Sunday

So I actually attempted to start this blog entry on Saturday night :(

I was supposed to post a great simple Sunday blog about red fish. Well as you can tell, a red fish entry was never posted. My hubby and I went out of town early Friday afternoon and I figured I would just find something from Boerne, TX to post about.

There were many wonderful things about our trip to write about...none of which were really healthy. It all started with Dairy Queen on our drive there, Boerne Bakery "pigs, hogs and cheese pockets," soggy sandwiches and beer during our river float, a delicious steak, rib, salad and bean dinner prepared by our host, ending with another "pig, hog and cheese pocket breakfast."

With all of those wonderful foods you would have thought that I would have posted something. Well I had no idea you can't use blogger on your iPhone! I had taken several great pics and couldn't load them, nor could I write anything in the text section! Thus I had no way to post my Sunday Funday foods!

Even though I skipped out on my weekend post, I promise to make sure you get the great Red Fish recipe I had planned. Look for it this Saturday. As for today, I think Laura has a great post up her sleeve that should be up around lunchtime...enjoy!

Dog Days of Summer, Volume II

I love my husband very much…but I also love my four legged children! This Saturday is another day to showcase our loved ones.

Even before Rusty and I were married, I was dying to get a dog. I have always grown up around animals, be it rabbits, horses, cows, ducks, dogs or cats, and I was tired of being pet free. Rusty and I ended up waiting to get dogs until we were somewhat “settled” in Dallas. Once we knew when, we had to decide what. I have ALWAYS wanted a Westie. Rusty, however, didn’t know what he wanted. During our decision making process he would throw out different breeds…anything but a Westie. He didn’t have a reason to not get a Westie he just wanted something else. I had a hard time accepting that even though I had ALWAYS wanted a Westie, we were going to get some random breed that he never had any dreams/passion/desire etc etc to get. Thus we ended up with 2 children instead of one.

The first boy we got was Riley. He arrived via plane from Indianapolis. It was love at first sight!


Our second “flying son” came from Arkansas.


Surprisingly the boys got along quite well…


And grew up much quicker than we would have liked…


While they were growing up they did lots of funny things, most we tried to catch on camera, but some of our favorites are only memories :(


No matter how silly, disobedient, dirty or loud these boys may be … they will always be our “sons.”


Hope you enjoyed meeting the Chiles! Have a great Saturday!

Friday, August 20, 2010

Orange You Glad It's Frozen Friday?

I don't think they are!!!!


Today’s frozen recipe comes from Alton Brown. To be quite honest, I don’t really like Alton. He is a bit too hyper and ADD for me to watch for 30 minutes straight. One night, for some crazy reason, we settled on watching his show. Thankfully for you, it was an episode about oranges. Thus last night, I made low fat orange sherbet!


This recipe seems to have a pretty simple ingredient list but it ended up being pretty labor intensive.

I started out juicing all of my oranges. Luckily, when Rusty and I got married, we were gifted a Cuisinart juicer. It is a lifesaver when it comes to recipes that call for large quantities of fresh juice. Other than those times…it sits in our cabinet.


After juicing the oranges I start working on the orange zest. There are 2 different methods for zesting. On the left, you will see the bigger zester. It turns the orange rind into a consistent, long strand of orange. I love to use this tool if I am garnishing. On the right you have the micro planer. This makes a very fine zest. I ended up using a combination of both for this recipe.


After everything is all mixed together, you stick the mix into the freezer for about 30 minutes. Once thoroughly chilled, pour the mix into your ice cream machine!!!!!


In about 30 minutes you will have a nice soft serve style sherbet.


If you put the soft serve in the freezer for an hour you will have sherbet that is a bit more formed. I topped this version with a little melted chocolate…very Kath (if it were coconut butter).


The sherbet was delicious! Very fruity but not overwhelming. Even though I used low fat milks, the sherbet had a very creamy, rich texture and flavor. Next time I will probably not use the large zest. It had a nice visual effect but when you bit into it, it was almost like hair got stuck in the sherbet :(

Taste: Seconds Please!
Waist: Tighten your belt a notch….this was only 95 calories for the half cup serving, and very satisfying!

Light Orange Sherbet
¼ cup sugar
¾ cup Splenda
2 cups fresh squeezed orange juice, about 3 lbs of oranges
1 ½ tbsp orange zest
Juice from ½ a lemon
1 tsp vanilla
½ cup 2% milk
1 cup skim milk

In a food processor blend together the first 6 ingredients. Gently whisk in milk. Return mix to freezer for approximately 30 minutes. Pour chilled mixture into ice cream machine and let it mix for 30 minutes. Either serve straight out of the mixer or pour sherbet into a shallow, air tight container and chill for 2+ hours until desired consistency is reached.
Makes approximately 1 quart.

Wednesday, August 18, 2010

Another Winner!

I feel really bad for Laura...I think I ended up getting all of the good recipes!! Tonight's recipe was a delicious empanada recipe. If you aren't from Texas, these are regulars on every Tex Mex menu. Typically they are deep fried and super greasy! I was really surprised when Paula's recipe didn't call for deep frying.


When buying all of the ingredients, I decided to be a little lazy and pick up canned chicken. I feel a little hypocritical simply because I talk to my patients about choosing fresh or frozen items over canned. I think the biggest issue with salt intake is that we often look for the easiest option. What isn't easy about pre-cooked, chopped chicken? Good news is that we didn't add anymore salt to the recipe.


Once everything was all mixed together I started filling and folding the empanadas. This is really where the recipe gets to be a little time consuming. You put a tablespoon sized dollop of chicken mixture in the middle of the pie crust circle. Before you start to fold, I recommend rubbing the pie crust with a little water and then pressing your finger down around the chicken mixture. This helps spread out the crust so it will fold a little better. I decided to also close the empanadas with a fork. Most of the empanadas I have seen have those neat little fork marks and mine were no exception!


These little pockets turned out just right. One thing you could try, would be brushing the tops with a little egg white and turning the oven to broil for a few minutes to give them that crispy brown look.


I decided to put my empanadas on a bed of shredded lettuce and topped them with some fresh diced tomatoes. After I started eating I ended up adding a little low fat ranch. I know that may sounds weird to some of you ... ahem Laura ... but there is a great restaurant, Chuy's, that has a jalapeno ranch dip that is delicious on everything Mexican.


That stats are a little confusing. If you read Paula's original recipe, she makes 16 - 2" circles and only fills them with 1 tsp of meat. Even though I added an extra 1/2 cup of veggies, I had a ton of mixture left over. I made about 18 circles and filled them with 1 tbsp of chicken. I had about half leftover. Not sure where Paula gets her portions from but my calculations are based on her original recipe and serving sizes.


Baked Empanadas (amounts for 16-18 Empanadas w/ 1tbsp filling)

2 cups chopped, cooked chicken
1 cup low fat Mexican blend cheese,
1/4 cup chopped red bell pepper, sauteed
1/4 medium onion, sauteed
2 ounces fat free cream cheese, softened
1 jalapeno, seeded and chopped, optional (aka I didn't use this)
1/2 tsp ground cumin
1/4 tsp salt substitute
1/4 teaspoon pepper
1 (15-ounce) package refrigerated pie crusts
Water


Preheat oven to 400 degrees F.


In a large bowl, combine the chicken and next 8 ingredients. Unroll 1 pie crust onto wax paper. Cut out rounds, using a 3-inch cookie cutter. Re-roll dough as needed. Repeat procedure with remaining pie crusts, making 16-18 circles total. Arrange 1 round on the baking sheet. Lightly brush the edges of crust with water. Place 1 tbsp of chicken mixture in the center of the round. Fold the dough over the filling, pressing the edges with a fork to seal. Repeat with the remaining rounds and chicken mixture. (Up to this point, the recipe can be made ahead and frozen for up to 1 month). Arrange empanadas on the prepared baking sheet. Bake for 15 minutes. Enjoy!